


Many of us are well used to scheduling our Facebook ads to run with the use of ad set start and end dates. This is a perfectly viable method for scheduling your ads…but did you know there is another way? If you are looking to find a different way to manage your ad scheduling, then read below for how to turn ads off and on with automated rules.
How To Set Up Ad Scheduling With Automated Rules
You can easily set up ad scheduling with this method is five easy steps.
Step 1: Go to your ads in the accounts that you want to schedule.
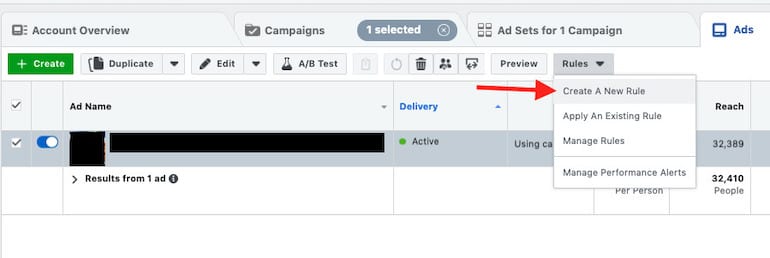
Step 2: Select those ads, click the “Rules” drop-down and then select “Create A New Rule”
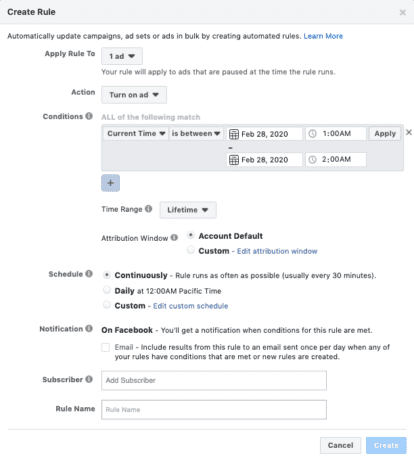
Step 3: Set up a rule for your ads to turn on. Change the action to “Turn on ads” and then under condition make sure you choose “Current Time” and then choose “is between”. After that choose that date and time you want your ads to start. The screenshot below shows an example of this.
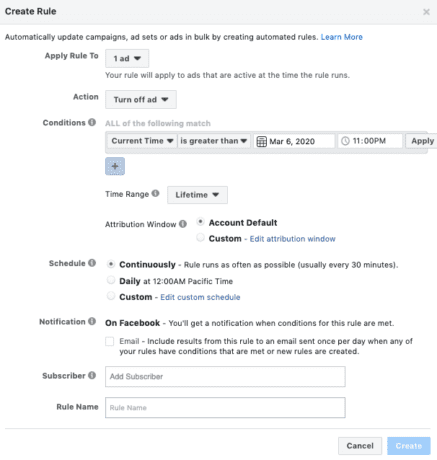
Step 4: Select the same ads and go through the above process but this time make sure your rule is to turn the ads off instead of on. For this, you can either choose the condition to be “Current Time” and “is between” or “is greater than”. Choose “is between” is you plan on having these ads run again sometime and choose “is greater than” to make sure those ads stay off forever.
Step 5: Go to your accounts automated rules section and double-check that your rule saved correctly to avoid any mishaps.
Benefits Of Using Automated Rules To Schedule Ads
Using this method helps in mainly two ways. First is that it prevents you from having to create new ad sets all the time. This will help you keep ads all in one place for easy access and comparison. Second is this method helps ensure you are not resetting the “learning phase” of the Facebook algorithms on your ad sets. Every time you recreate the ad set, it needs to go through a testing and learning phase. So if you want to avoid that, this method can help.
