Adding Facebook Ad Block Lists
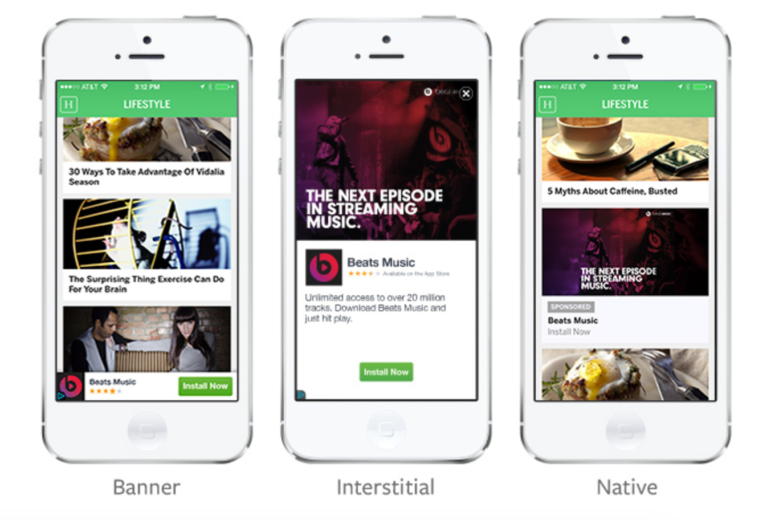
If you’re new to Facebook, you’ll see familiar placement options to show your ads (Facebook, Instagram, & Messenger) along with Facebook’s Audience Network (think Google’s Display Network). The Audience Network places your ads can show across different websites who have opted into the audience network along with instant articles and video. Analyzing Display Network Placement is important for getting the best performance and it’s no different on Facebook.
Blocking your ads from appearing on certain websites is something that may be forgotten about after the creativity of ad design or building that perfect audience but it can have a big influence on how one interacts or feels with your brand. You’ll want to ensure you’re doing all you can when opted into the Audience Network to prevent unfortunate pairings or backlash.
What is Facebook’s Audience Network?
For those unfamiliar, Facebook’s audience network allows marketers to expand their marketing efforts to users off of Facebook while using the same powerful targeting that one can use on Facebook. The Audience Network delivers ads in these main creative formats:
- Banner
- Interstitial
- Native
- In-stream video
- Rewarded videos

Marketers can use their already uploaded creative and reach a larger group of users. If you have an audience that has worked really well for you in the past, this is a great way to expand your reach. While Facebook’s audience network is smaller than Google’s Display Network, it has grown in size since introduction and it is very easy to opt in and get your ads running.
Quick Tip:
If you’re trying the audience network out for the first time, start with your remarketing campaigns. Since these users have already shown some interest, you won’t have to worry about where your ads are showing when making the first impression with someone.
Facebook makes it easy to segment performance based on placement, so you’ll be able to judge how effective the ads are and then make a decision to opt in your prospecting campaigns based on data.
The Importance of Placement Exclusions
Facebook’s Audience Network can be a powerful tool but there is one part that has frustrated me, and I’m sure, many other marketers. There is no transparency as to what websites your ads are showing on. Unlike GDN, one cannot pull a placement report to see performance across the various websites. One simply has to trust Facebook that they’re finding the best placements.
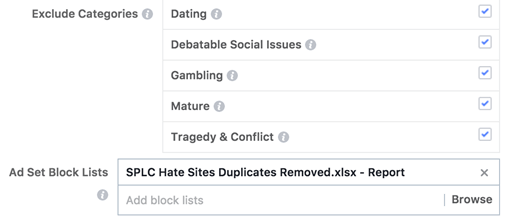
The good news is Facebook does have some basic exclusions you can opt into; though, not nearly as expansive as GDN. Facebook has the majority of the controversial content covered with these broad exclusion categories. Google gives some more detailed categories but the catch-all categories Facebook uses should do the trick. Sounds great, right?
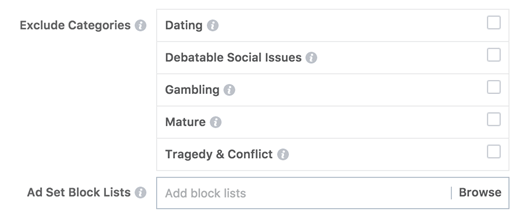
As a quick example, debatable social issues are something a lot of brands will want to avoid and opting out is as easy as clicking that little button above. One click may get the job done partially but Facebook does specifically say they can’t guarantee anything and this exclusion category seems to focus on video content rather than web content.

Beyond the fact that it’s impossible to think that Facebook can cover every, the sliding scale of what one deems as controversial is different for everyone. That’s why taking the time to create a block list can be that extra safety net you need to ensure your ads are showing along with compatible content.
Facebook Ad Block Lists
Block lists are Facebook’s solution to adding large amounts of negative placements to your ad sets. This will be similar to creating a shared placement exclusion if you’ve done so on GDN.
Since one can’t pull placements directly from Facebook, you’ll have to get creative with what you’re uploading to exclude. Simply transferring over placement exclusions from GDN would be a great place to start. Since performance can be different, you can always get a little bit creative by finding a list of controversial political sites, dating sites, or anything else that you wouldn’t want to show with your brand.
How to Add a Block List
Adding a block list can be tricky the first time but it’s actually rather easy. When you’re in ads manager, you’ll simply expand the full range of menu options and navigate over to business settings.

From there, on the left-hand side, you’ll want to navigate down to the section titled block lists.
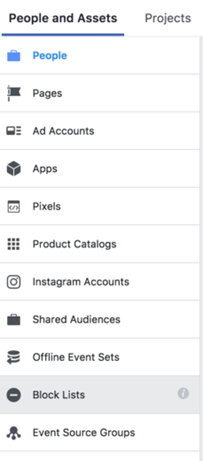
From there, select the account you’re working with and hit create block list in the upper right. Once again, make sure it’s the correct Facebook ads account if you’re managing multiple (it always changes on me). From there, upload your excel file. It does allow you to get creative depending on the type of content you’re running on the Audience Network. From blocking URLs to Facebook pages, you give yourself the ability to have some control and transparency around what type of content you’re showing with.
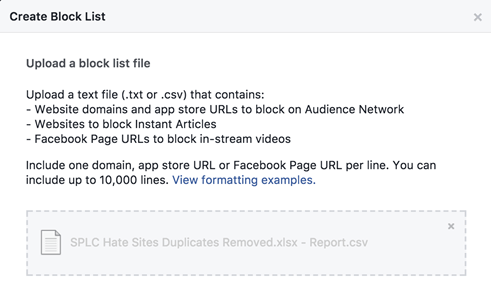
Now you can add them to your ad sets once you’ve opted into the Audience Network.
Final Thoughts
While not as easy as Google makes things, taking the time to add placement exclusions to Facebook is important if you’re worried about showing up with undesirable sites. No one wants to come into work Monday morning with a bunch of Tweets or Facebook messages from consumers asking why you’re advertising on a site that they don’t agree with.
It’s impossible to prevent it completely but very possible to do your due diligence in making sure it doesn’t happen regularly. You’ll be able to add that extra piece of mind with your client or social media team knowing unfortunate pairings are less likely to happen.


