Tomorrow is Thanksgiving, but today feels like Christmas. I have been reading about Google’s new contextual targeting tool for a few weeks and wanted to try it out, but it wasn’t available in our accounts. The powers that be at Google must have been listening because this morning when I sat down at my desk, there it was: Google’s Contextual Targeting Tool.
This new tool allows users to quickly and easily create keyword lists to run on the Google Display Network. Advertisers can type in the keywords or phrases they want to target and within seconds Google creates a list of hundreds of keywords sorted into ad groups. Even more intriguing, this tool provides insight into how Google thinks when identifying themes for display network ad groups.
The Display Network
In case you are new to PPC advertising or are just not familiar with the Google Display Network, I’ll give you a very brief overview of what it’s all about. The Display Network is a collection of websites that have partnered with Google to display AdWords ads. To decide on which site to place your ads, Google looks at all the keywords in an ad group to identify a theme. The theme is then used to match ad groups to websites to determine where your ads will show.
The display network is a great place to gain leads but it generally has a much higher cost-per-click than the Search Network. This new tool should help advertisers create more tightly themed ad groups to place ads on relevant websites.
Contextual Targeting Tool
The Contextual Targeting Tool is still in beta and will continue its rollout over the next few months. Since it is not available to all advertisers I want to provide a walkthrough of the tool so you can see how you can use it to create a campaign on the Google Display Network.
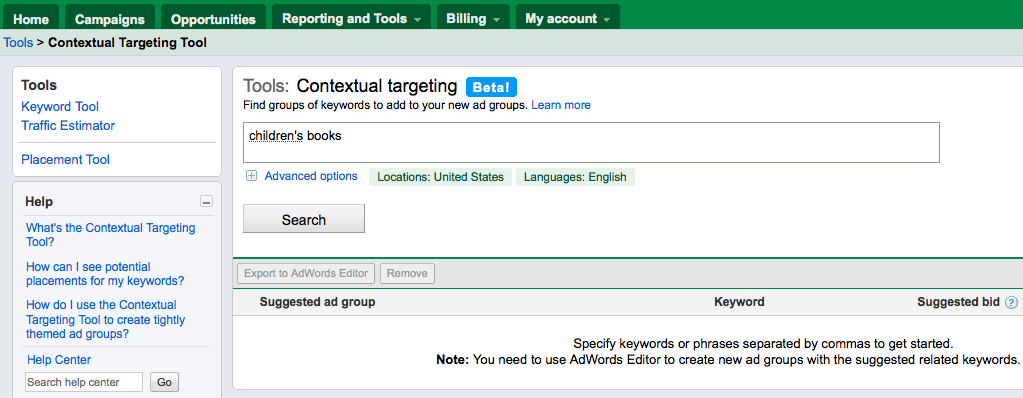
The Contextual Targeting Tool can be accessed two ways:
- Through the drop down menu on the Reporting and Tools tab.
- Underneath Tools on the Opportunities tab.
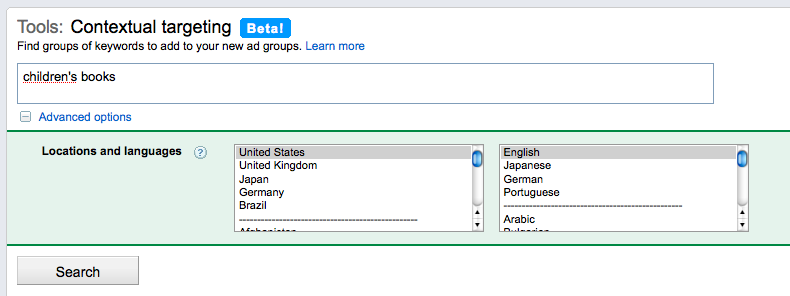
Clicking on the link takes you to a page that looks similar to the Keyword and Placement tools pages. You enter in the phrases or keywords you want to target into the search box. Our best practice in creating ad groups for the Display Network is to select top performing keywords and build ad groups around them. In my example, I am looking to build ad groups around a top keyword “children’s books.” (click on images to enlarge)
The default location and language are set for United States and English. You change these settings by clicking on “Advanced Options” below the search box. Changing these settings will affect the results Google produces.
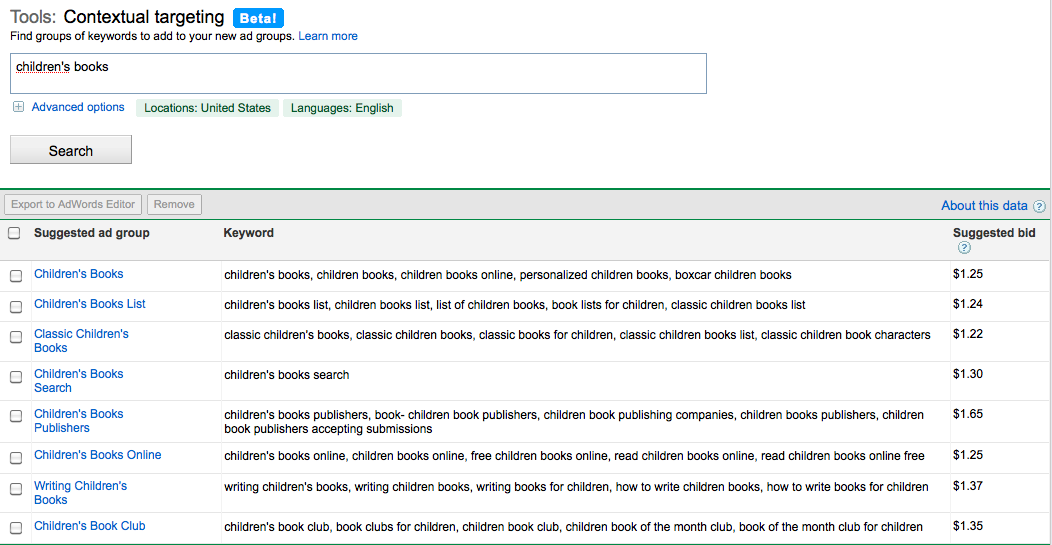
Once you have entered in your terms and set the location and language simply click search and Google will work its magic.
Google sorts the keywords into suggested ad groups and also provides a suggested max CPC bid. This bid is based upon historical bidding information from ads that have appeared on the sites the new ad group is predicted to appear. It may be tempting to stop here and do exactly as Google says but you should edit the results to better fit your account. There are three features you can use to tailor the results to your account.
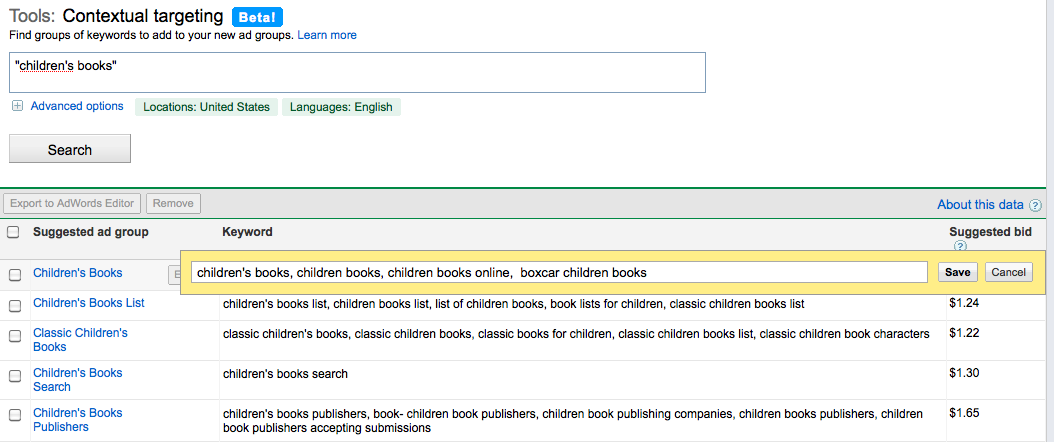
1. Edit Keyword List
You can edit the keyword list by clicking in that column. Let’s say I don’t sell personalized children’s books; I can simply delete that keyword from the Children’s Books ad group and save the new list.
2. Expand Ad Group
If you find an ad group that might have potential to bring in a lot of clicks or leads, you can have Google dig deeper by clicking on expand next to the ad group name.
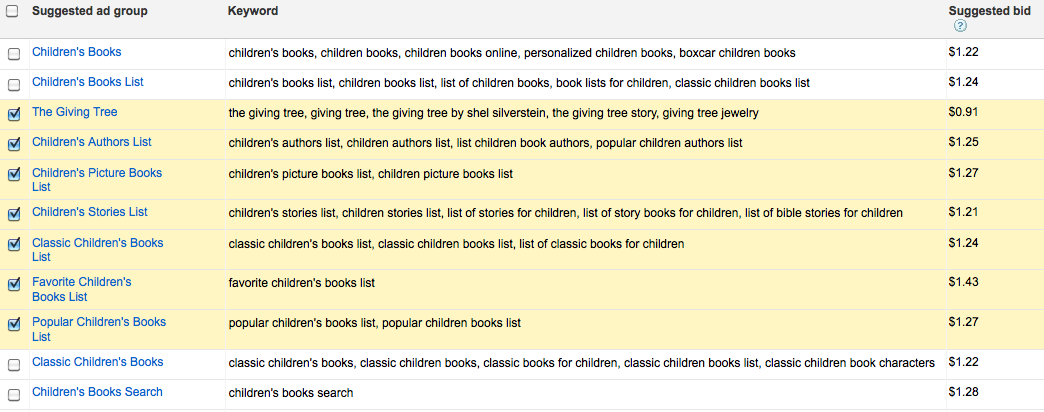
In my example, I want to drill down into Children’s Book List to create more tightly themed ad groups around the same concept.
By expanding one ad group, I got seven more potential ad groups for my campaign. Again, just because Google deems keywords relevant it doesn’t mean they are. If I don’t sell “The Giving Tree” I wouldn’t include this ad group. Even if I did sell it, would I want to create a whole display ad group around one book? Always think of your audience and campaign goals and use them to edit Google’s results.
3. Predicted Placements
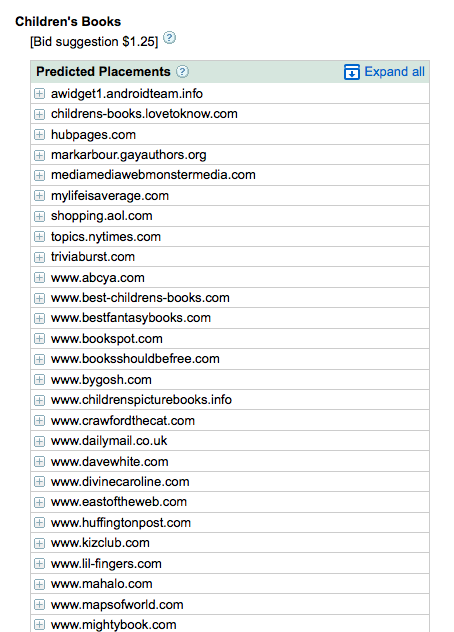
The third feature in the Contextual Targeting Tool is predicted placements. Google provides a list of the pages it believes each ad group will appear. To view the predicted placements list, click on the name of any ad group. I want to view the predicted placements for Children’s Books.
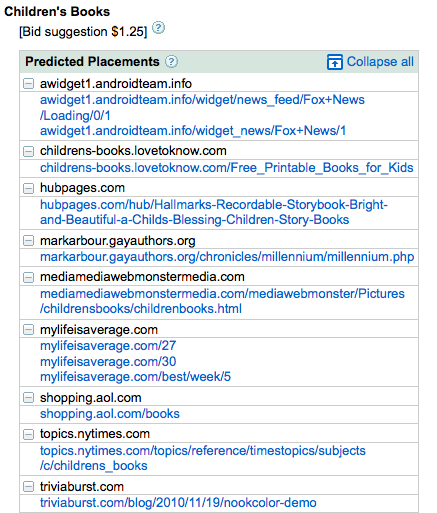
These are the potential websites your ads will show based upon your keywords. By clicking on a site you can view the specific page within the site your ad will appear. If you want see expanded results for all sites, click “Expand all” in the top right corner.
This feature is beneficial because it allows you to view sites that would bring in irrelevant clicks before you waste your budget. Exclude any sites you don’t want to appear on at the campaign level to increase the relevancy of the pages your ads show on.
Export Ad Groups
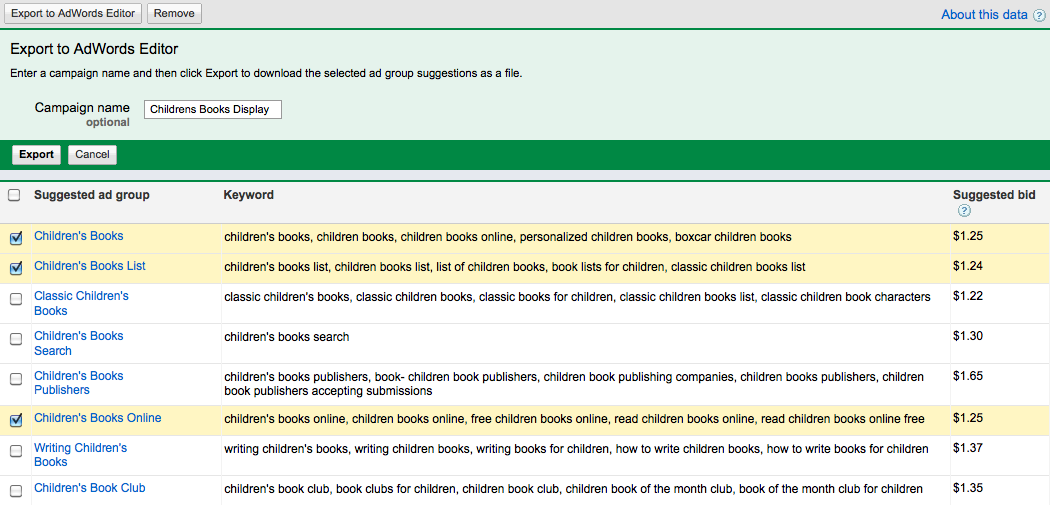
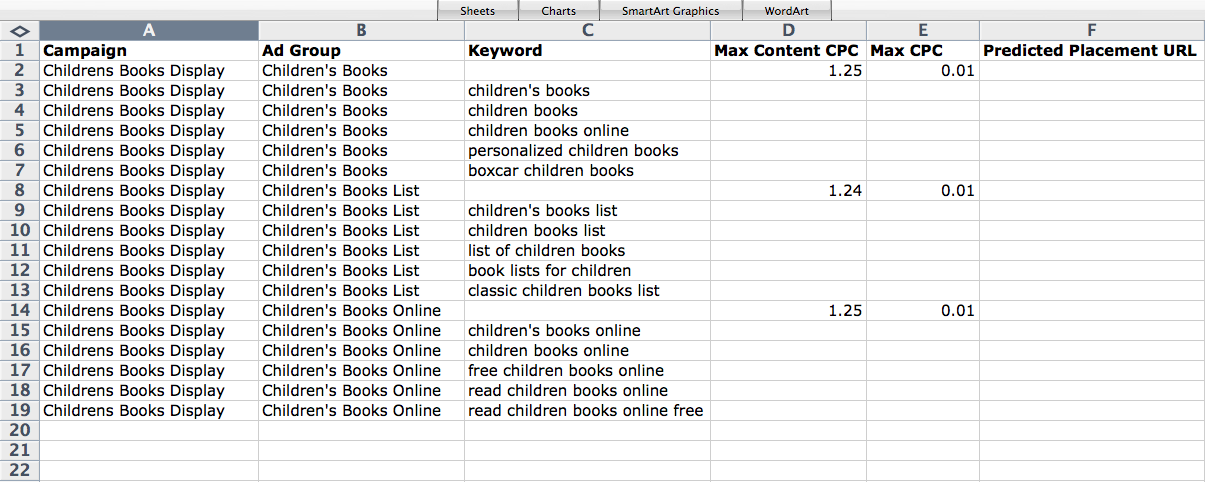
You’ve edited your keywords, created more ad groups, and know which sites you want to exclude. The next step is to export your new ad groups to upload them into AdWords editor. Select the ad groups you want and click the “Export to Adwords Editor” button.
You will be prompted to enter in a Campaign name, although it’s not necessary to do before exporting. Once you hit export, your data will open in a .csv file.
At this point you can make changes to the max CPC bid Google suggested. Once your file is complete, import it into AdWords Editor. Set the daily budget for this campaign and make sure to target only the Display Network. Post your changes to your account and you now have new ad groups running on the Google Display Network!
I am excited to start using Google’s Contextual Targeting Tools. I’m hopeful it will help to optimize the performance of campaigns on the Display Network. If you have had experience using this tool or have any questions please post below!


