
As Facebook advertising continues to expand targeting options and more money is being invested in Social PPC, it’s important to know which ads are actually driving conversions. Below we will cover how to setup Facebook conversion tracking and how to use that data to optimize for conversions.
How Does Facebook Conversion Tracking Work?
The Facebook conversion pixel allows you to track offline conversions from your site. For example, by placing the conversion pixel on your site’s thank you page you are able to track when a user clicks a Facebook ad and converts within a 28-day cookie window. To do this, you need to create Facebook Ads in Ad Manager or Power Editor that are set up to send traffic to website conversions.
1. Creating Facebook Website Conversion Pixel
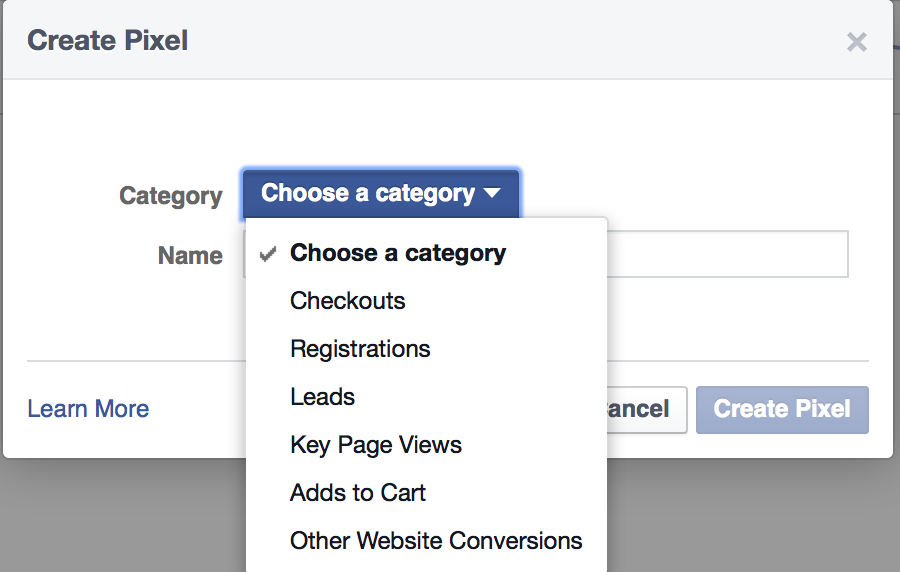
In order to start tracking Facebook website conversions, first login to your Ad Manager account and click on the “Conversion Tracking” section on the right hand side of the page. From here hit the “Create Pixel” button and select what type of offsite conversion you will be tracking and then give the conversion pixel a name. Here you have the ability to track several conversion types including leads, check-outs, and other key actions on your site. Facebook now also allows you to share Conversion Pixels across multiple accounts by entering the Facebook account ID.
![]()
2. Placing the Pixel
Once you’ve created the conversion pixel, copy the code and paste it between the <head> sections of your webpage(s) where you want to track conversions. After the code has been placed it can take up to 24 hours to verify that it has been placed correctly and is firing.
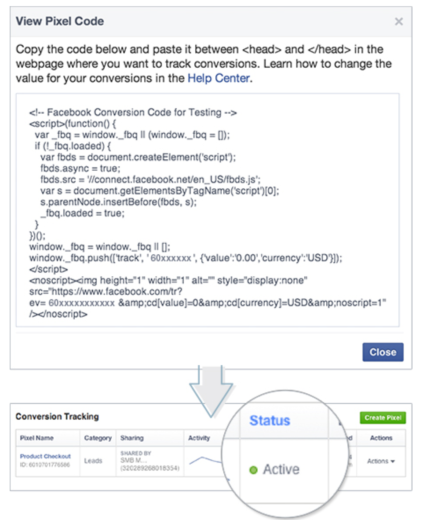
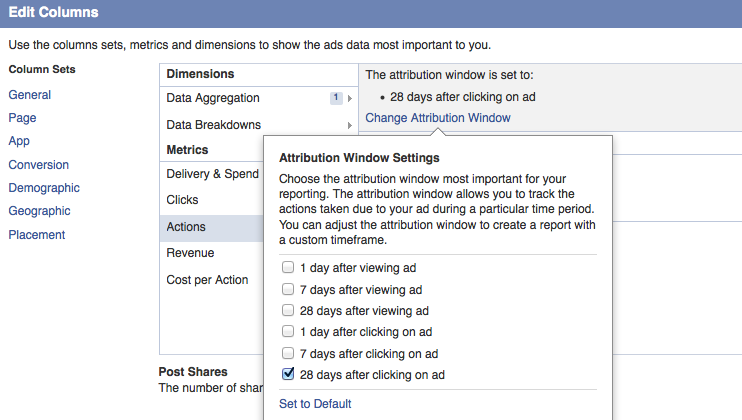
**Note: As with actions, Facebook tracks conversions for ads that happen within 1 day, 7 days, and 28 days after a person clicks on or views an ad.
3. Creating Ads Based on Conversion Actions
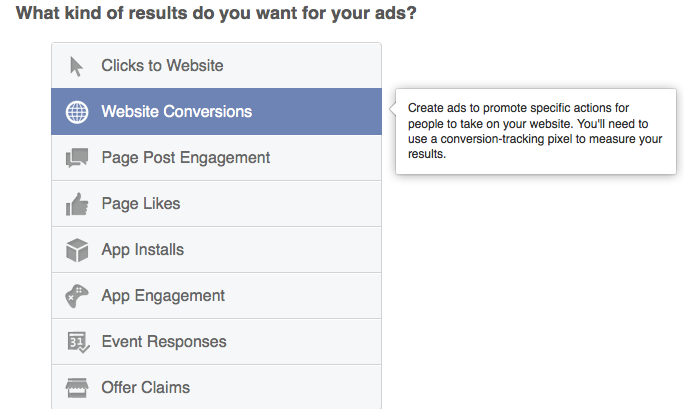
Now that you have created the conversion code, placed and verified the pixel is firing, it’s time to get started with ad creation. Start by creating ads in the Ad Manager or in Power Editor (Chrome). Select the “Website Conversions” and then the domain to which you want to drive Facebook ad traffic.
4. Reporting
Conversion code created – check, pixel placed – check, ads are live – check, now time to start seeing the real cost per conversion and determining your return on ad spend. In the Ad Manager on the left hand navigation, you can access the Reporting section. Once here you can create many custom reports. By default Facebook throws in a bunch of actions that may not be as important to you. You can easily add or remove columns of the key metrics you are interested in viewing.

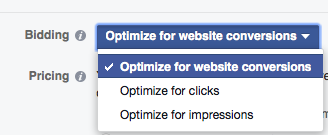
5. Optimize For Conversions – oCPM
Now that you have installed the Facebook conversion pixel, you have the ability to opt-in to Facebook’s auto-bidding system oCPM. This feature is designed to capture the highest-value impressions for your goals at the most efficient cost. Facebook does this by optimizing your ad and showing it to users who are more likely to convert (within your targets). Bids will then change dynamically based on competition, maximizing reach for your desired audience. Typically you should expect the total ROI on the campaign to exceed that of either a CPC or a traditional CPM campaign. I’ve tried both CpC and oCPM campaigns and so far, oCPM campaigns seem to drive more website conversions at a lower CPA compared to CpC. However, this can vary from campaign to campaign based on targeting options.
Conclusion
Whether it’s social or search, tracking is key for optimizing efficient PPC campaigns and improving overall ROI. While there are other methods of tracking conversions for Facebook, like Google Analytics, the conversions will never match 100% due to how specific platforms determine attribution. By installing the Facebook conversion pixel, you have the ability to not only optimize your ads directly in the Facebook or Power Editor but also opt-in to Facebook bidding algorithm systems like oCPM.
