

Meta instant forms ads are in-platform lead forms for Meta. They are designed to help you qualify leads directly on Meta by asking people to fill out a form attached to your ad. This way you can cut down the conversion path and capture customer data without asking users to leave the platform. The information captured will be kept for 90 days in Meta, so you it’s important to download your leads regularly. This is good practice.
Why should I use instant forms in Meta ads?
Some of the reasons why you should consider using instant forms for your Meta lead generation campaigns might be to:
- Conveniently capture lead data directly on the Meta platform which removes friction from the lead process.
- More easily capture data automatically pre-filled from a user’s Meta account
- Capture customisable information important to your business.
- Fosters transparency and trust with the user, thanks to a direct link to your privacy policy
- Use conditional logic to create a dynamic form and filter out prospects that don’t meet your requirements
. A more in depth article around using lead generation ads to grow your business can be found here.
How do I set up Meta instant form ads?
There are two ways to set up Meta instant form ads. This guide is focused on setting up an instant form via Meta ads manager. It is good practice to ensure your legal team reviews the questions you plan to ask on any lead form you as a business plan to use and this would include Meta instant forms.
Creating the form in Meta ads step by step
- Go to Meta ads manager and either create a new lead ad or select an existing draft with which you wish to run instant forms.
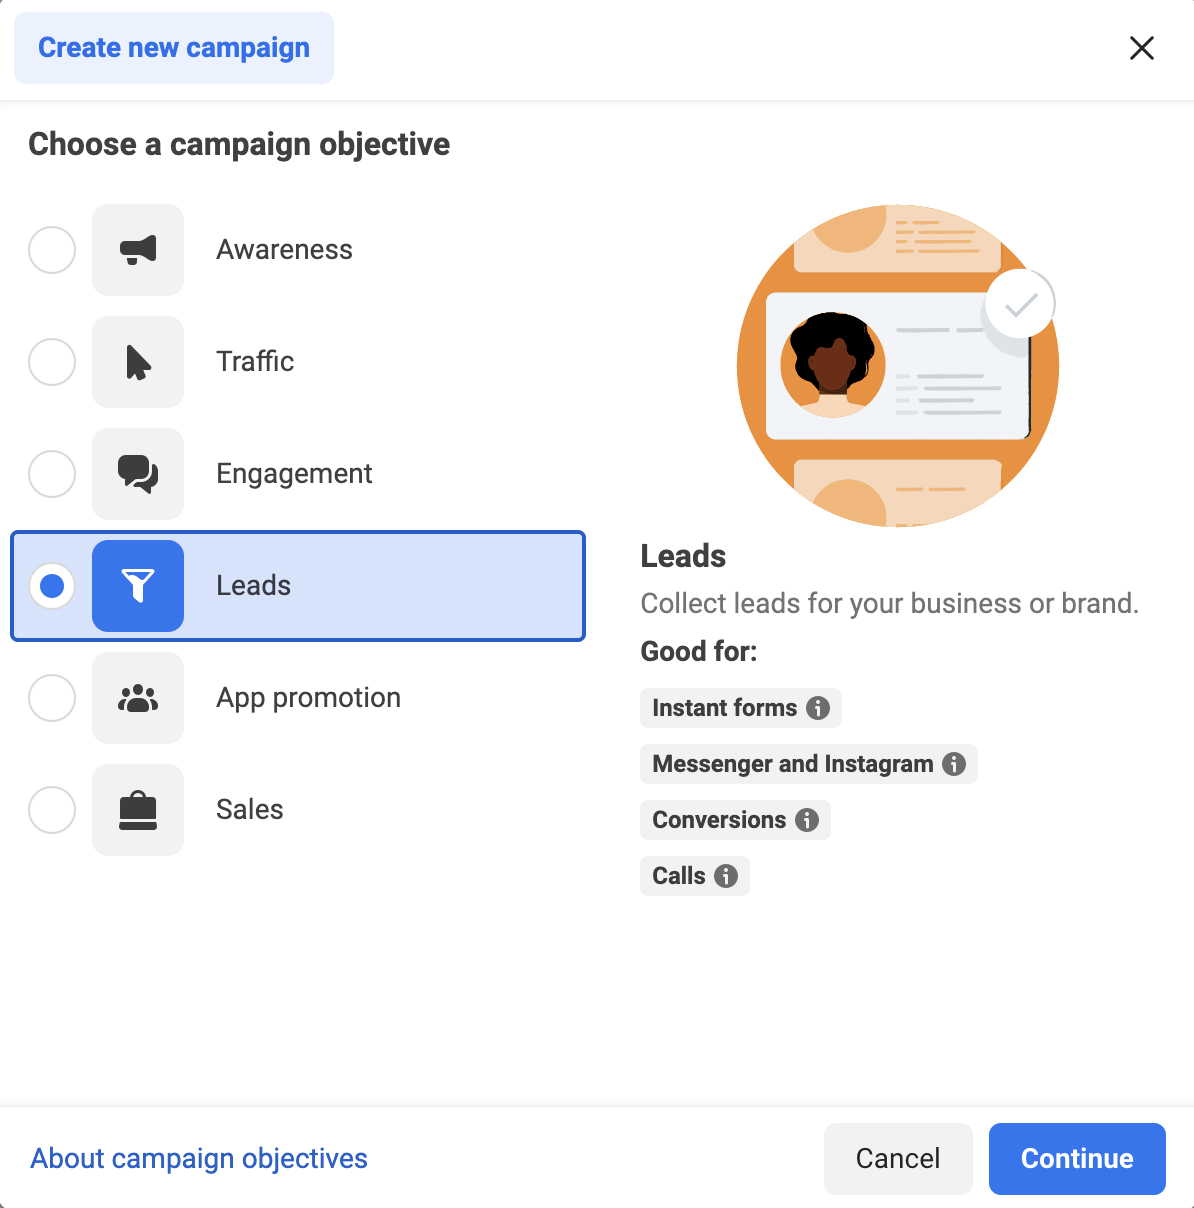
2. At the ad set level in either your new or existing draft lead ad campaign select the instant form conversion location. Note that once an ad set has been published the conversion location cannot be changed.
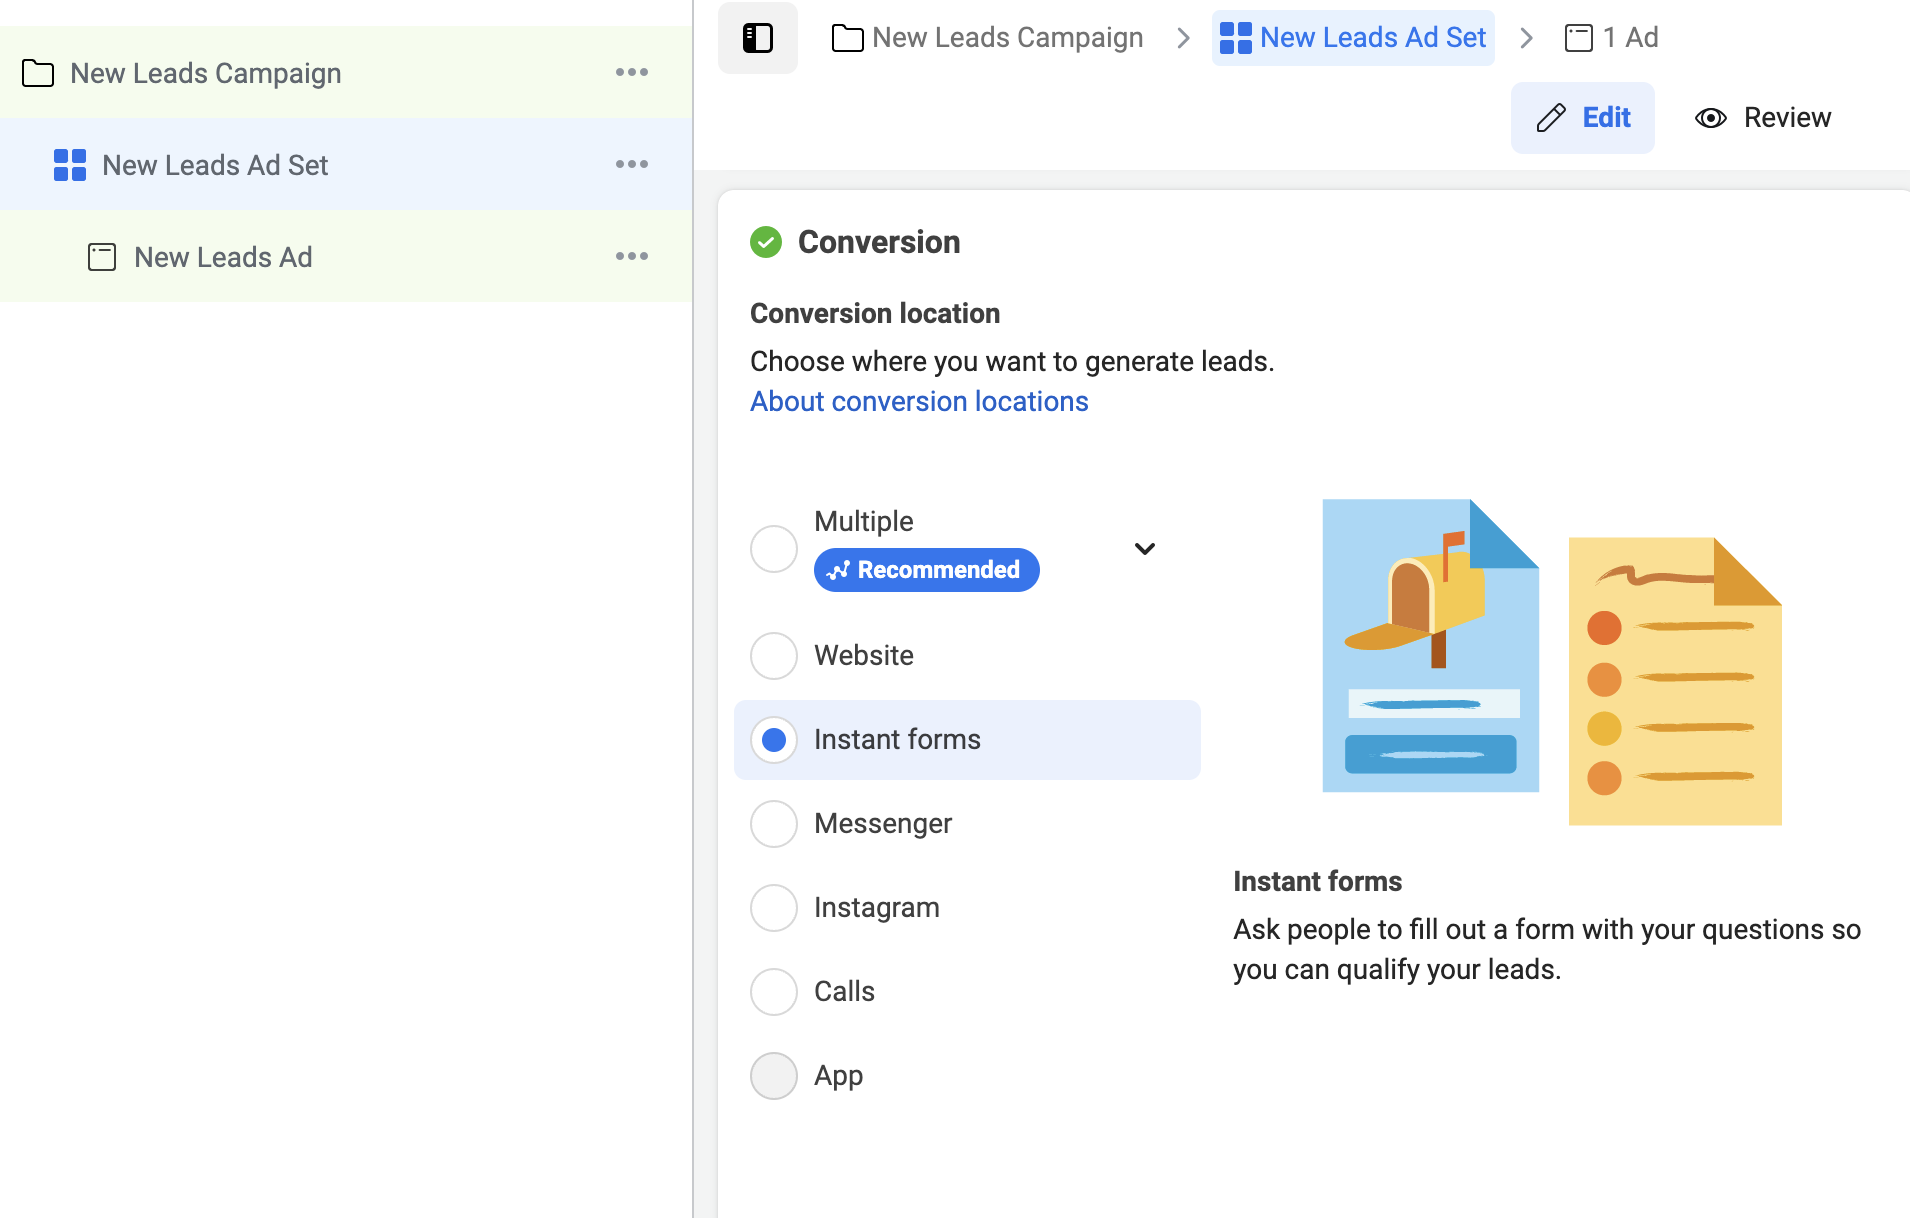
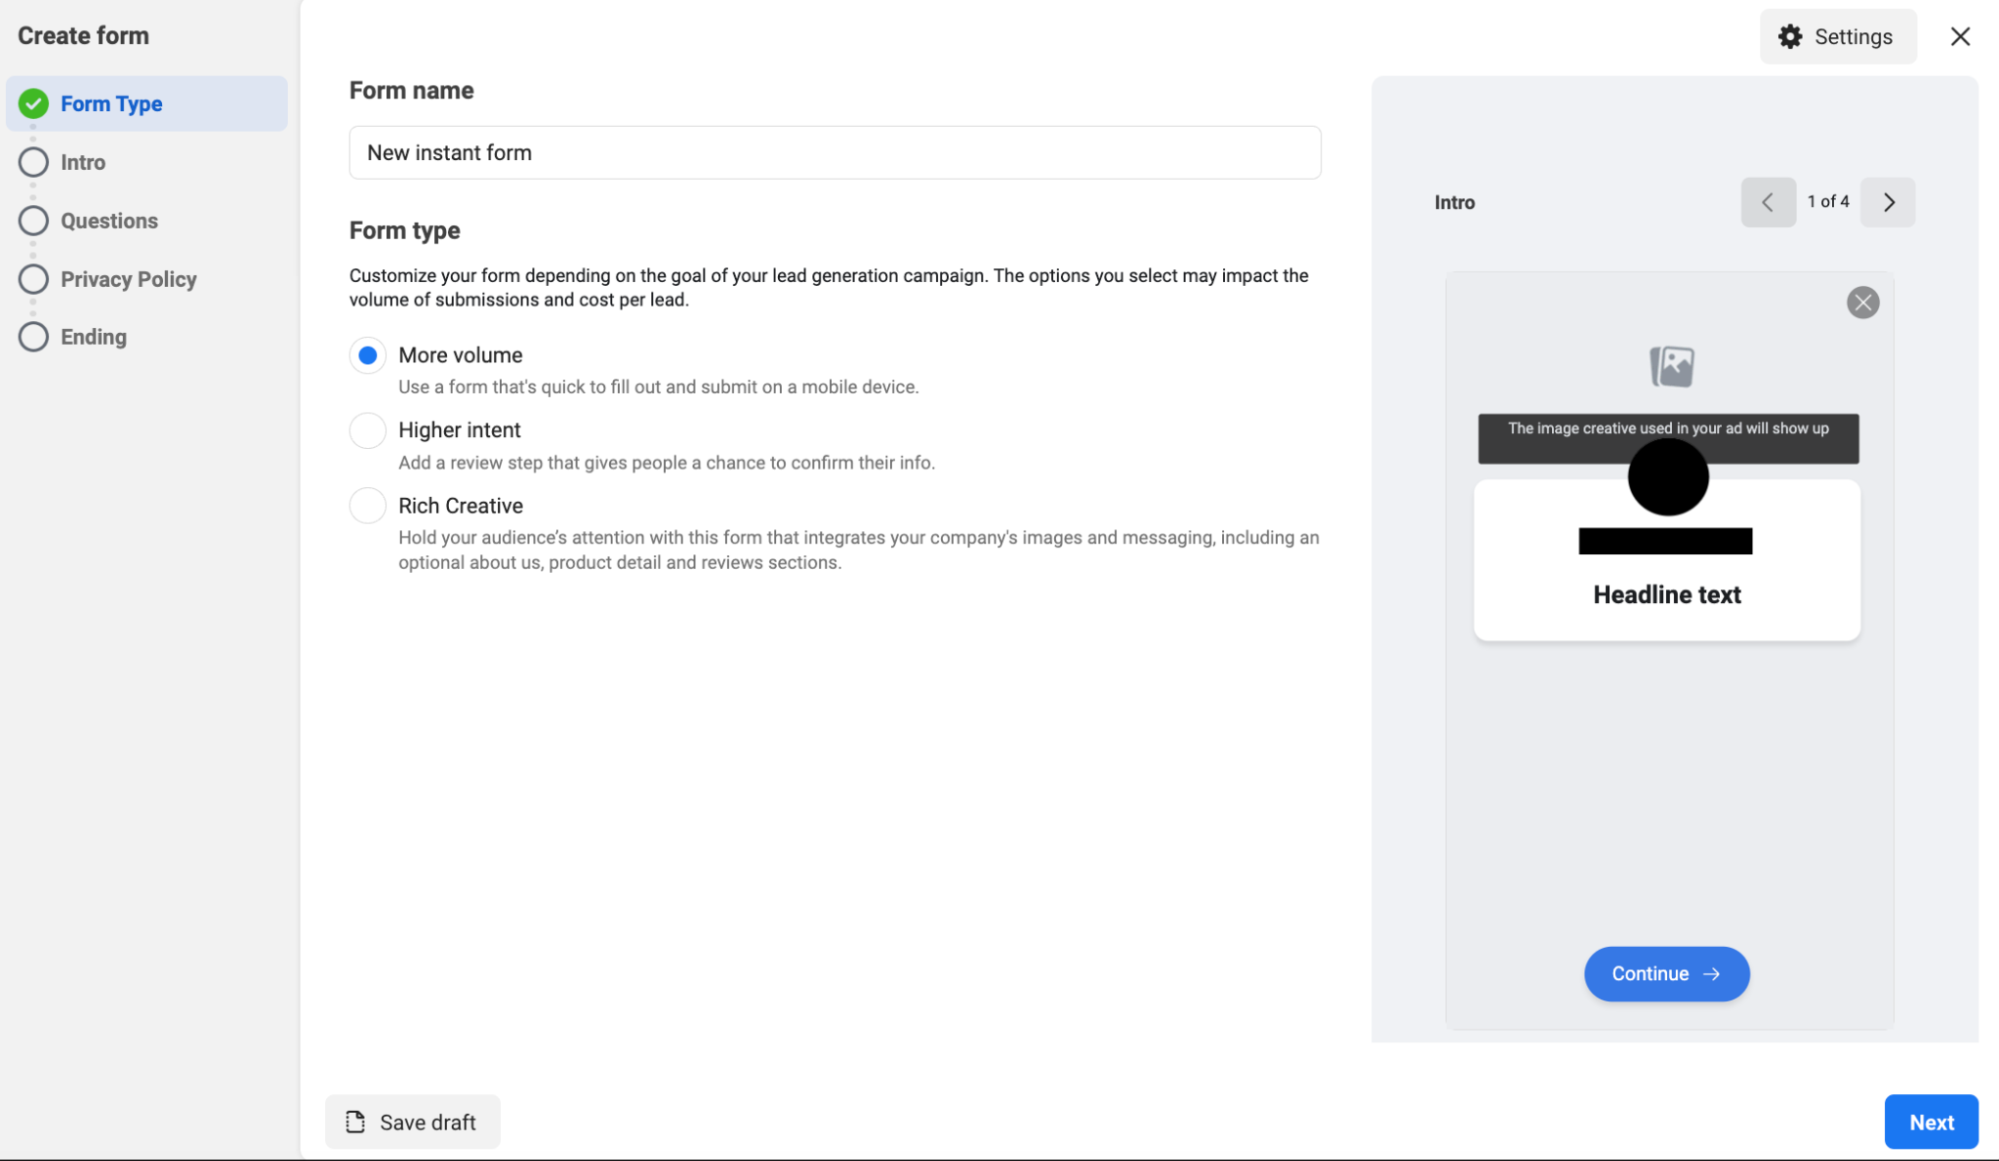
3. Navigate to the ad level and select create a new form. This will launch the form editor so you can build your form directly in Meta ads manager.

4. The first step in the form editor is selecting your form type. Your options are:
- More volume. This is the default form option. This option gives you a form that’s quick to fill in and submit on a mobile device.
- Higher intent. Effectively the same as the more volume option with an additional review step that gives people a chance to confirm their information before submitting it.
- Rich creative. Use your images, branding and messaging as well adding information such as product or service details and an about us section. Rich creative will only appear across the Facebook app on mobile devices.
5. Once you’ve chosen your desired form type click next.
Meta instant form ads intro section
6. In the intro section of your form you can choose to use an image from your ad or upload an image. The recommended image size is 1200×628 pixels. Keep in mind the data capture questions will cover parts of this image so it should be treated as a background image.
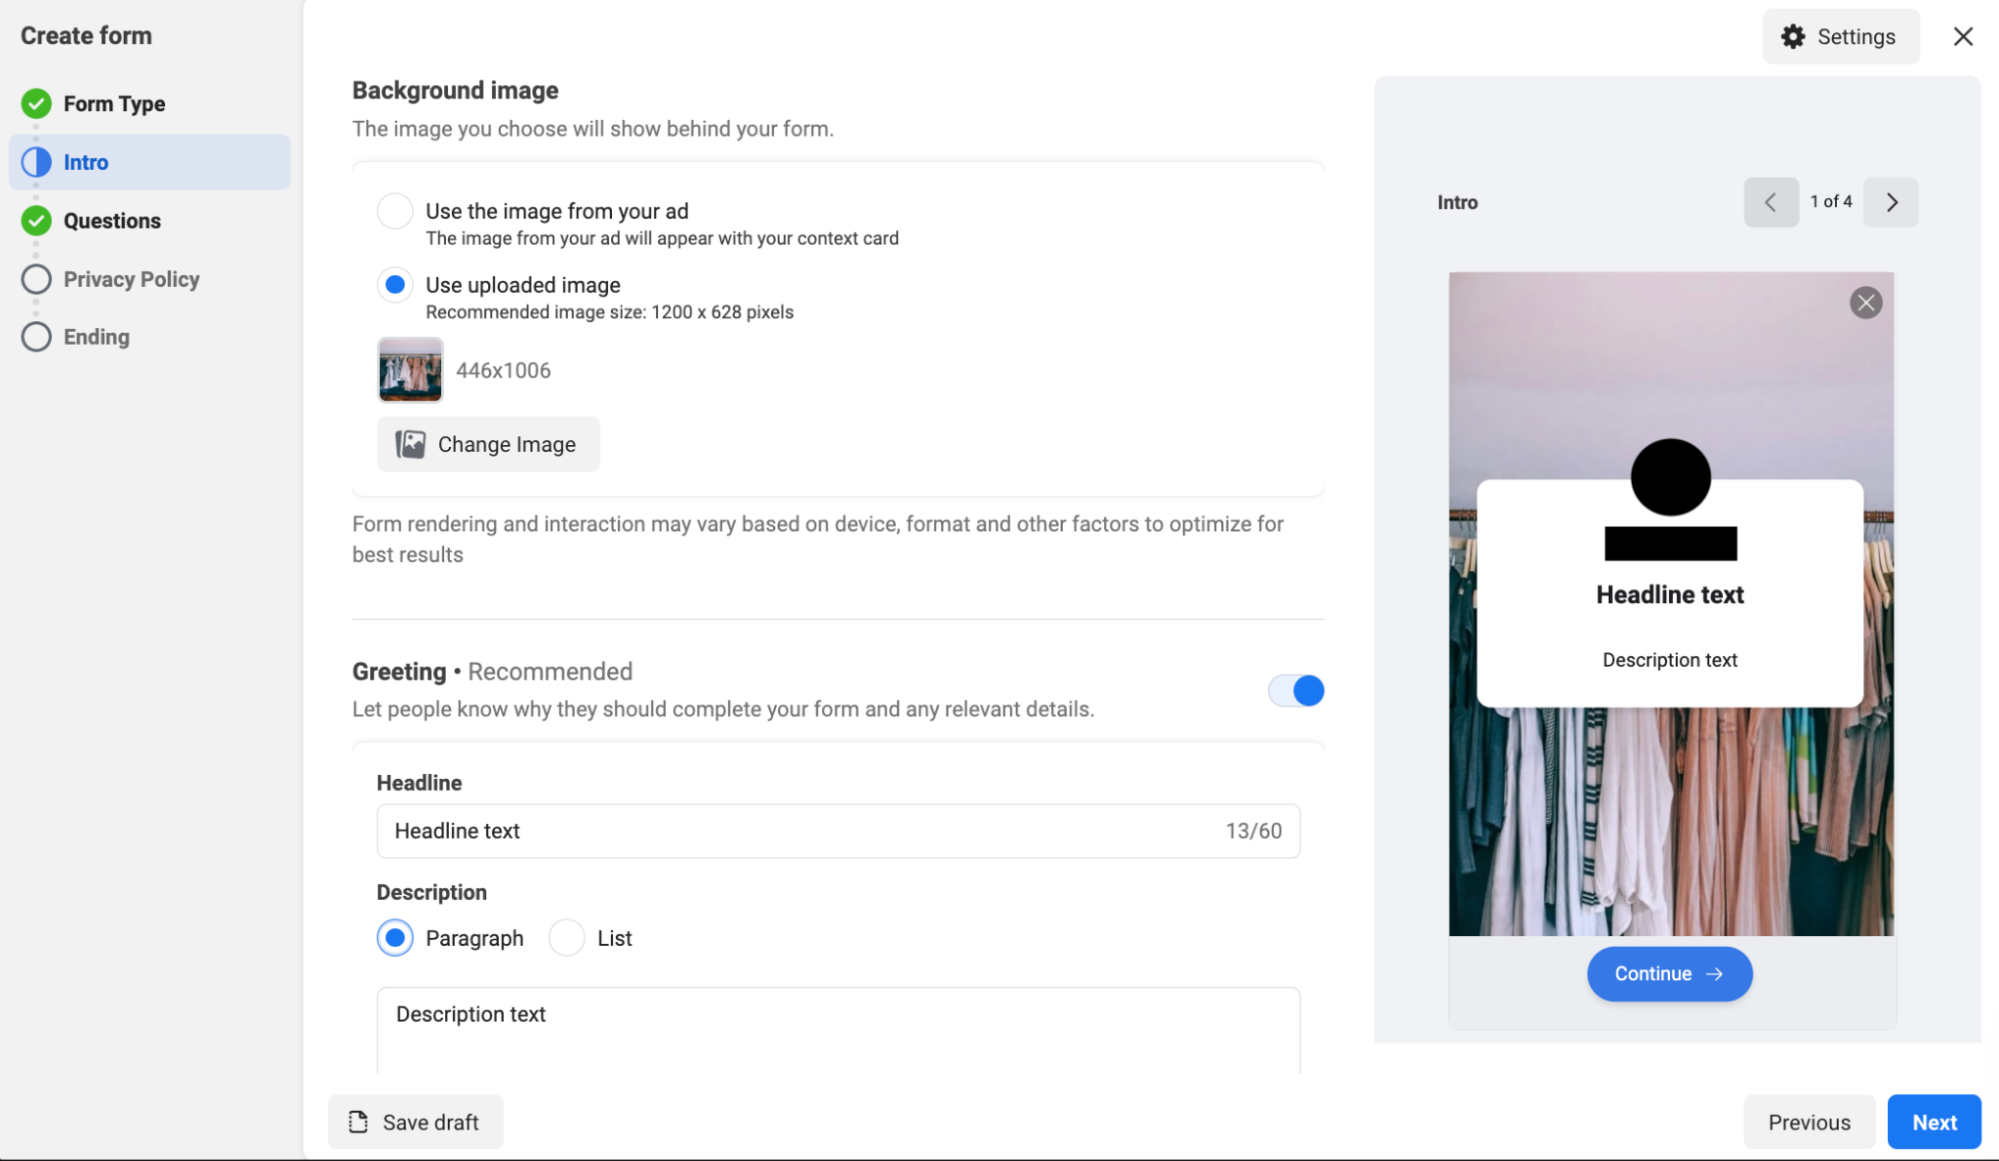
7. Next select a headline and a description for your greeting message. You have two format options for the description field, paragraph or list option. It is recommended that you do use a greeting message on your form regardless of which description format you choose.
8. Once you’ve finished, click next.
Questions section
9. In the questions section you specify your form questions and the information you want to capture for the user. You can use up to 15 questions but bare in mind the more questions a person is required to answer the more friction the form typically generates.
You also have some optional settings you can make use of and combine to create your form, but your form must contain a question in one format or another.
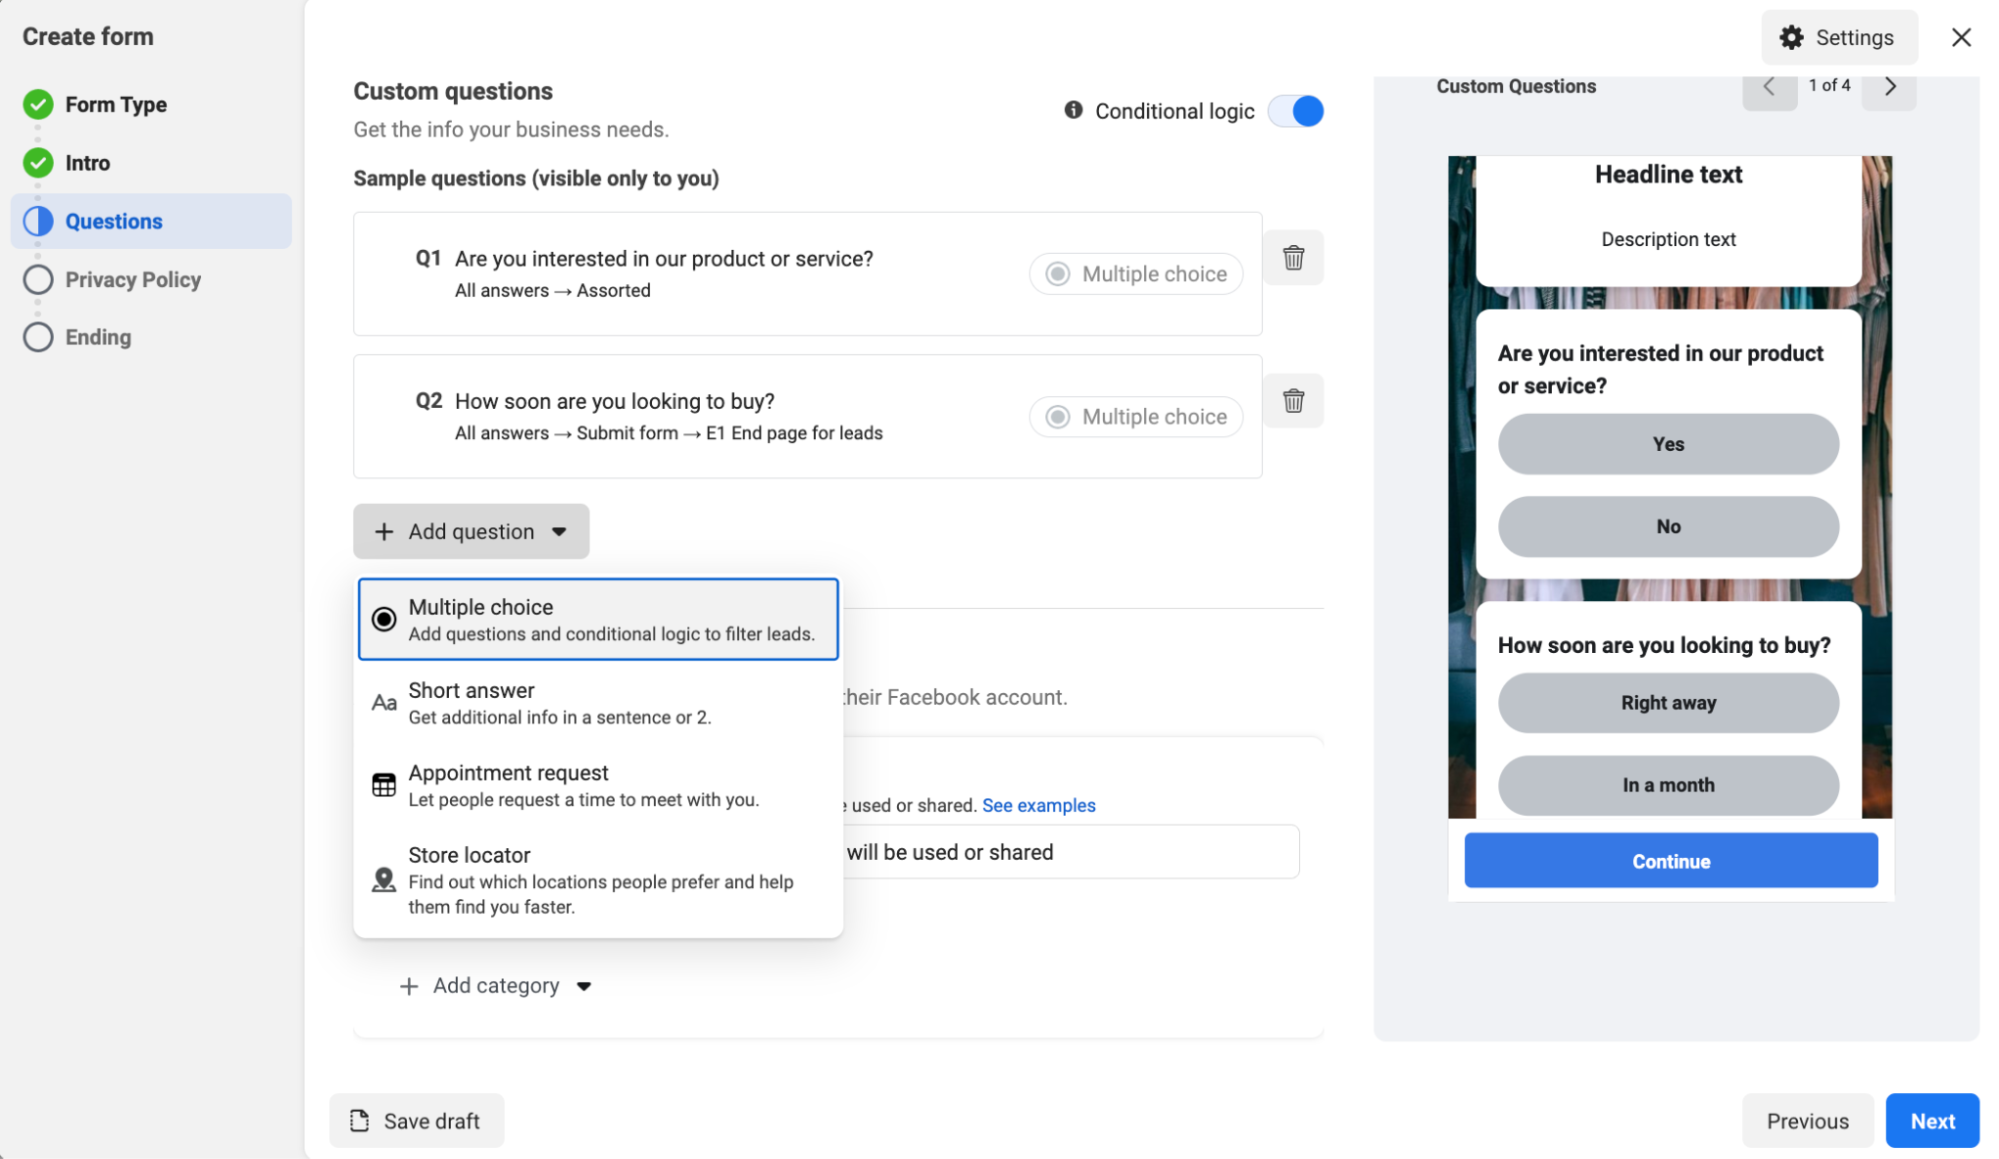
When it comes to the questions themselves:
A. You have the option to create custom questions.
B. You have the option to use conditional logic and create a dynamic form that changes based on the user’s answers.
C. You can choose specific categories of information you wish to capture on your form. These range from contact information, user information and demographic questions.

10. Once complete and your desired questions have been added click next.
Privacy policy section.
11. In the privacy policy section you need to add a URL link to your company’s privacy policy and the link text that will display on your form for that URL.
12. Here you can also add any custom disclaimer you wish to make.
13. Once complete click next.

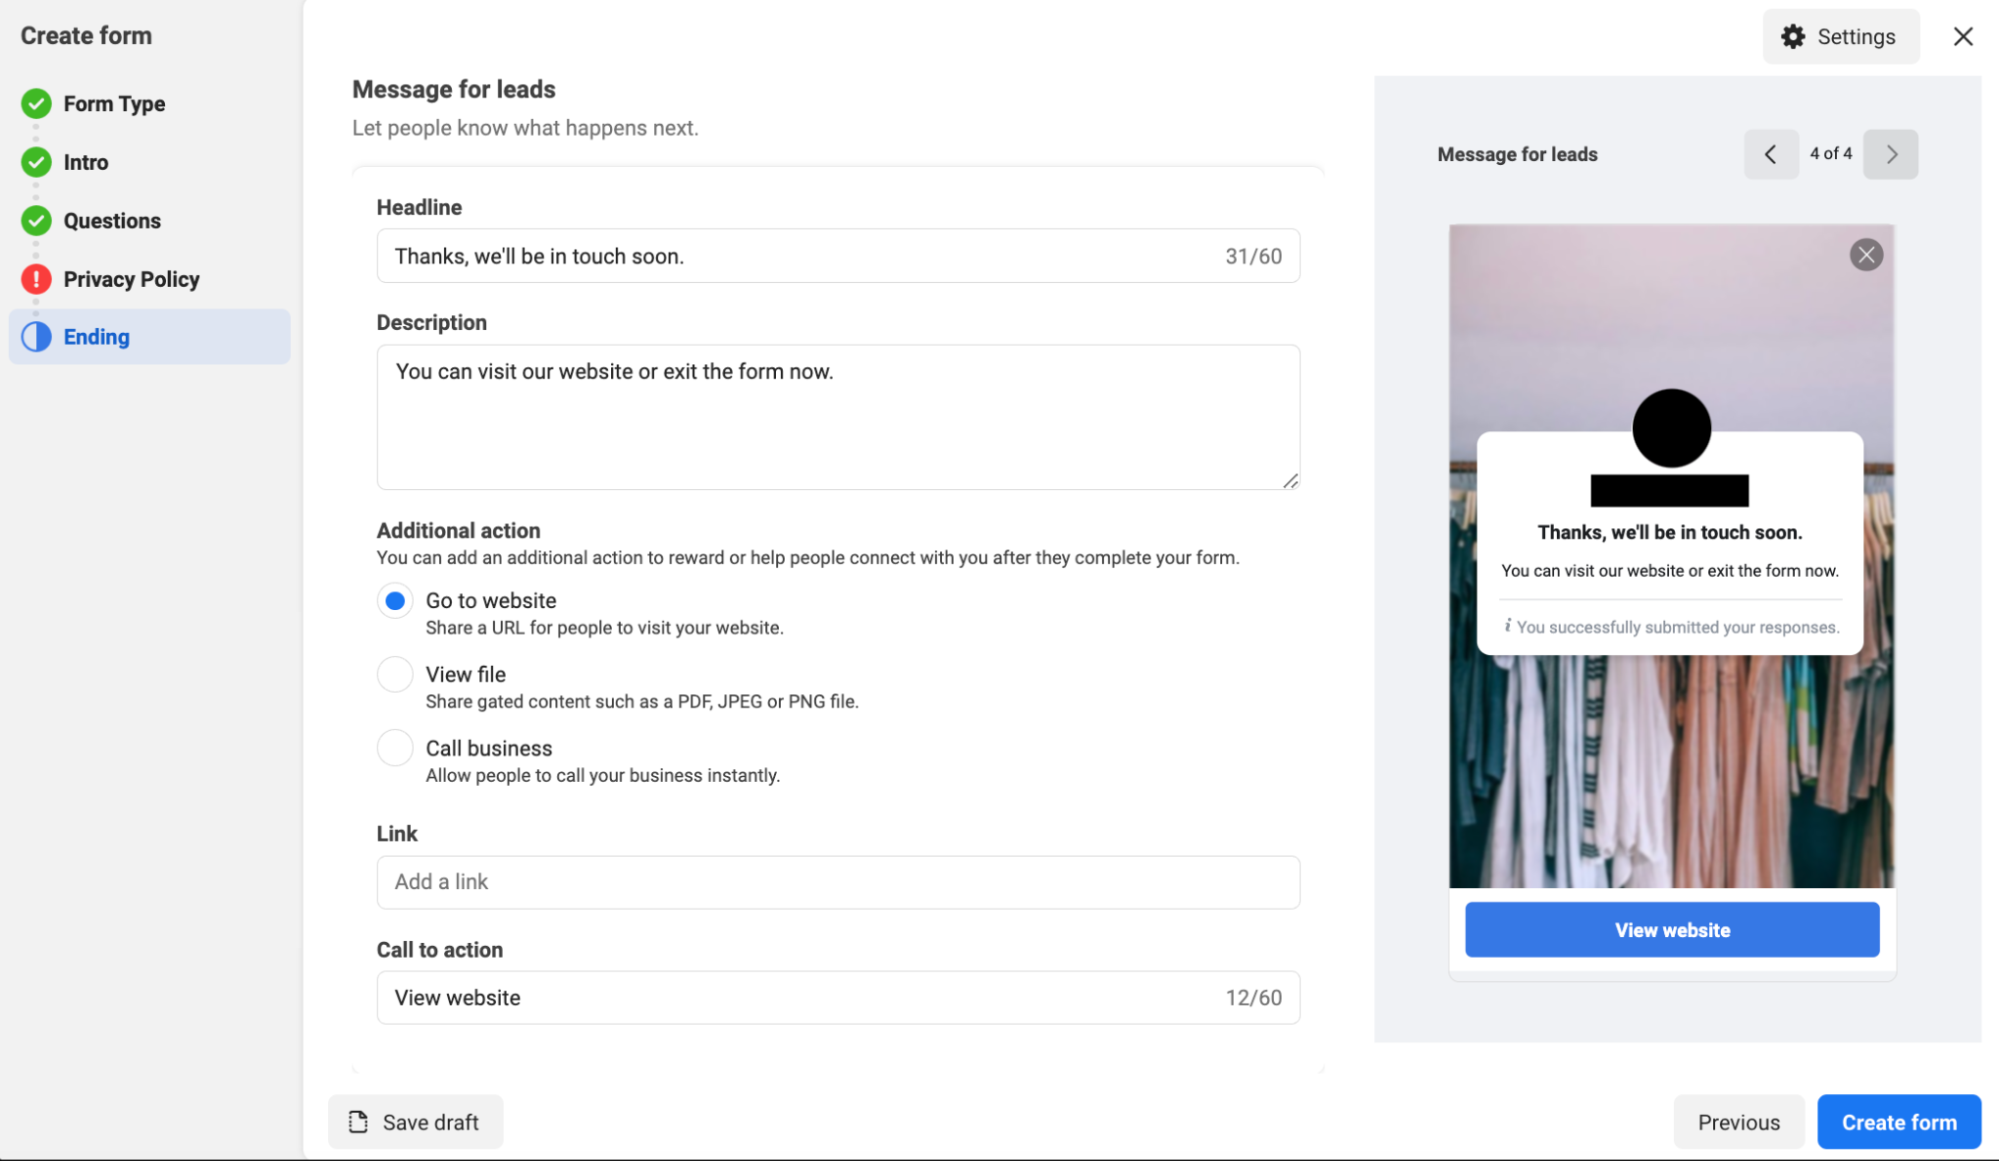
Ending/message for leads section
14. In this section you can now add a headline and description for your forms closing message. These should inform the user what happens next once they’ve submitted their information.
15. You also need to add an additional action. Additional actions include:
- Providing a URL link to one of your company’s web pages.
- Sharing a downloadable copy of a file to the user.
- Providing the user with a phone number to call.
16. The next step is providing a call to action text for your form.
17. Once complete click create form.
There you have it. You’ve created your first Meta instant form ad.
With the easy step by step walkthrough above you should be able to create tailored instant forms for your business that suit your needs and brand.
Meta ads instant forms are a valuable tool for lead generation on Meta platforms. They provide seamless experiences to users and can increase the chances of capturing a prospect’s information. If you’re running lead ads on Meta and you’re not testing instant forms then you could likely be missing out on an easy lead generation tactic.
